
先占坑(2305更新到MLP)
官方:中文;zh.d2l.ai ,原版英文:d2l.ai
下载ipynb(python文档):https://zh-v2.d2l.ai/d2l-zh.zip 或英文:https://d2l.ai/d2l-en.zip
目录:
0. 【知识社区】Ideas worth sharing. Practice worth noting.
1. 安装
2. 数据操作

---
3. 矩阵计算
4.
【加入论坛来,这里,你就是知识的主人】
https://discuss.d2l.ai/c/chinese-version/16 英文版东西更多:https://discuss.d2l.ai/c/english-version/5
Linux基础课开源平替:
https://missing-semester-cn.github.io/
从零开始,从安装开始,正在写
import torch
首先需要一张N卡,找对应可支持的CUDA版本,安装后(内置了一个,不用单独安装)pytorch comes with it’s own cudnn, so you don’t have to install it specifically),
VSCode 安装:
Set-ExecutionPolicy -ExecutionPolicy RemoteSigned -Scope CurrentUser
#Powershell把策略改了,可执行脚本,创建和激活python虚拟机
以下命令创建一个虚拟环境,方便隔离不同项目
python3 -m venv d2lsession
.\d2lsession\Scripts\activate 激活这个虚拟环境
# 看到 (d2lsession) PS D:\xxx\projects\pytorch>  就是进来了
#先升下pip 然后装torch
python.exe -m pip install --upgrade pip
# 20230322安装cuda11.8版的
pip3 install torch torchvision torchaudio --index-url https://download.pytorch.org/whl/cu118
#pip3 install torch #默认是CPU版的
pip3 install d2l
检查是否安装成功:
import torch
print(torch.__version__)
print(torch.cuda.is_available()) #检查cuda是否存在,N卡gpu用的驱动
# 输出:2.0.0+cpu
# 或者GPU版 2.0.0+cu118
True
手动下载wheel
并本地安装:
python -m pip install .\d2l-1.0.0b0-py3-none-any.whl --proxy=x.x.x.x:xxxx
加proxy因为pip会处理dependencies依赖
随后 pip install d2l
# 话说 可以pip install d2l== 来看要安装包的可选版本。(源中,这里即官方源)
经典报错:
building 'pandas._libs.algos' extension
      error: Microsoft Visual C++ 14.0 or greater is required. Get it with "Microsoft C++ Build Tools": https://visualstudio.microsoft.com/visual-cpp-build-tools/
上面是安装
1. 课程开始:
x = torch.arange(12)
print(x)
# tensor([ 0,  1,  2,  3,  4,  5,  6,  7,  8,  9, 10, 11])
## 检查(沿每个轴的长度)的形状 ##
x.shape
# torch.Size([12]) 就是1-d 向量(张量),1d一维,向量情况下shape=size里面有12个元素
## 检查大小(size)##
print(x.numel())
# 12
N维数组
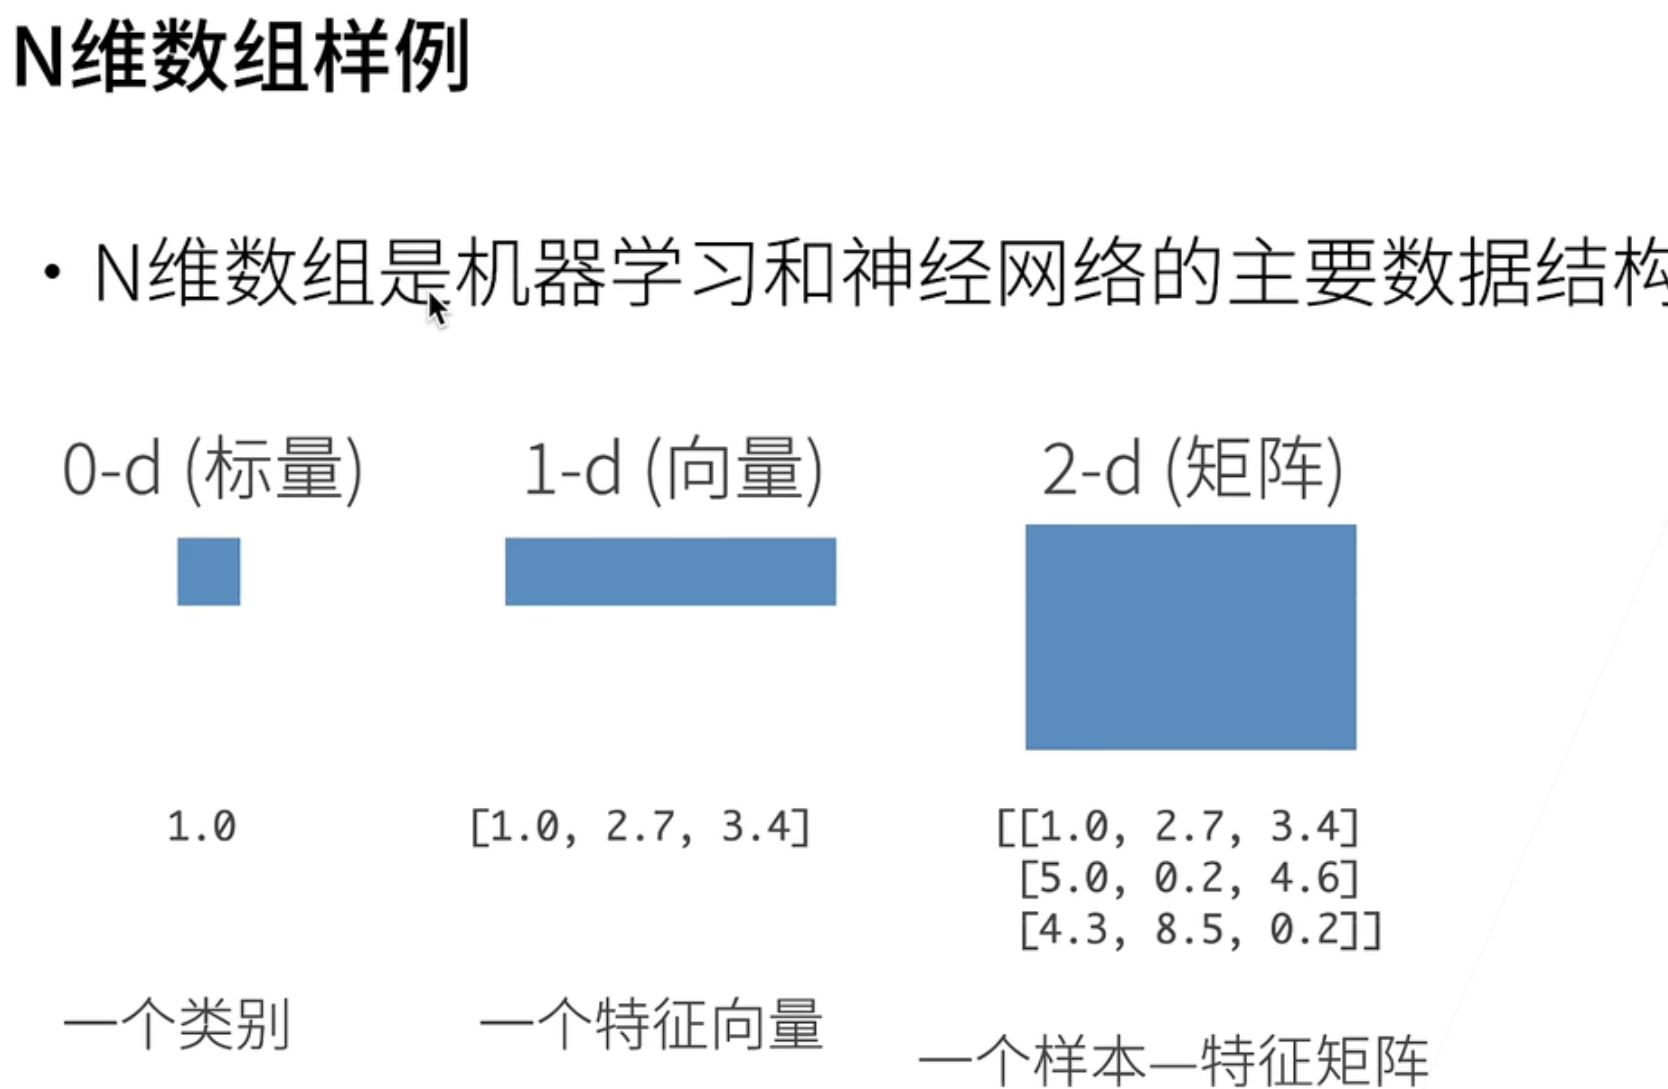
把张量x从形状为(12,)的行向量转换为形状为(2,6)的矩阵
X = x.reshape(2, 6)
print(X)
tensor([[ 0, 1, 2, 3, 4, 5],
[ 6, 7, 8, 9, 10, 11]])
X = x.reshape(6, -1)
print(X)
tensor([[ 0, 1],
[ 2, 3],
[ 4, 5],
[ 6, 7],
[ 8, 9],
[10, 11]])
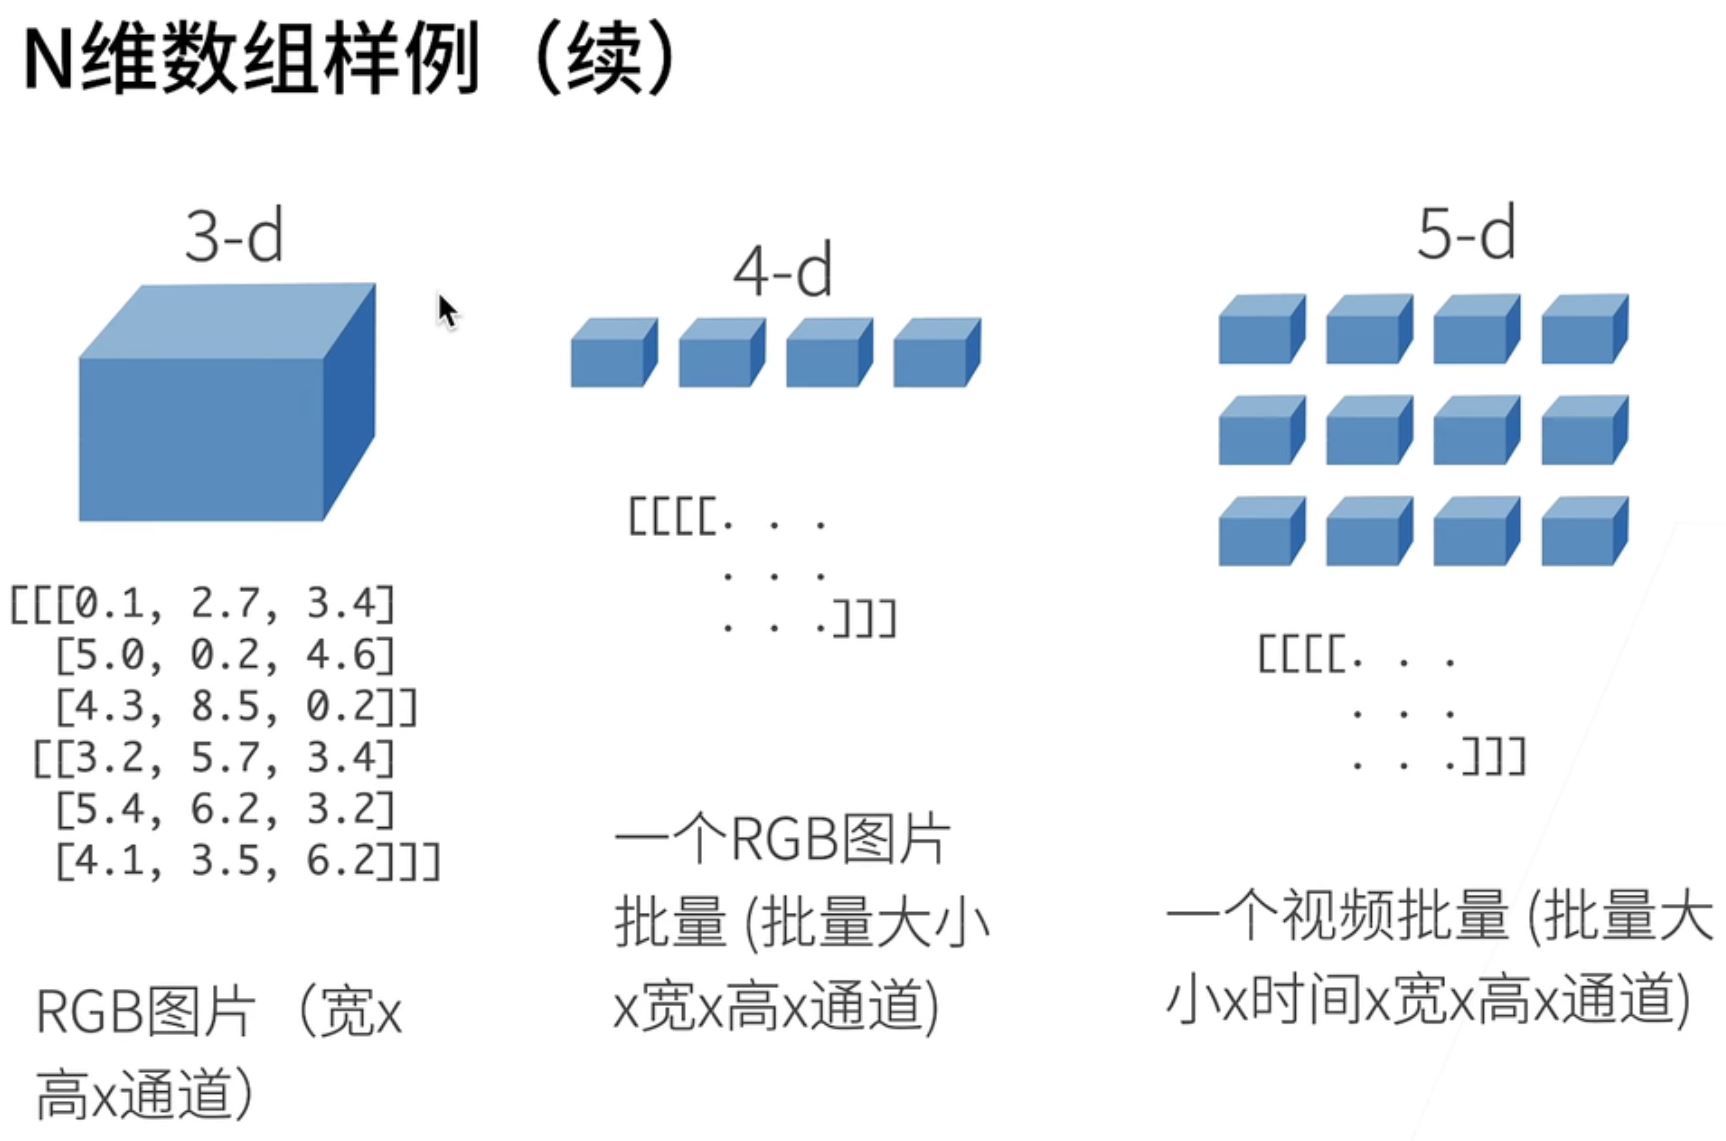
3维数组 x,y,z: 2,3,4
print(torch.zeros((2, 3, 4)))
tensor([[[0., 0., 0., 0.],
[0., 0., 0., 0.],
[0., 0., 0., 0.]],
[[0., 0., 0., 0.],
[0., 0., 0., 0.],
[0., 0., 0., 0.]]])
4维数组:
[[[[... ...]]]]
每次读图片是一个批量batch,一次读很多张图片
5维数组:
视频
批量大小*长*宽*高*时间维度
访问矩阵里元素:
tensor([[ 0,  1,  2,  3],
        [ 4,  5,  6,  7],
        [ 8,  9, 10, 11]])
# 一个元素,第2个。(从0开始数)
[1,2]
tensor(6)
# 第一行
[1, :]
tensor([4, 5, 6, 7])
# 第一列
[:, 1]
tensor([1, 5, 9])
# 子区域, 左闭右边开区间。从第一行开始,选中到第二行,从第一列开始选中到右
[1:3, 1:]
tensor([[ 5,  6,  7],
        [ 9, 10, 11]])
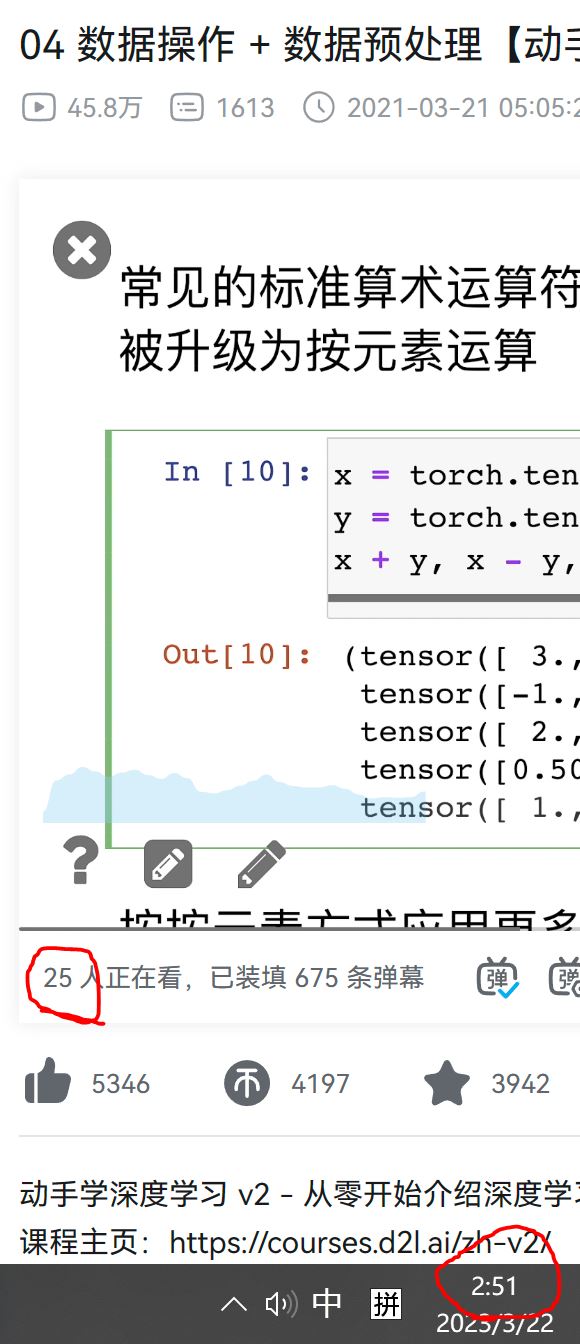
张量运算
x = torch.tensor([1.0, 2, 4, 8])
y = torch.tensor([2, 2, 2, 2])
print(x+y,x-y, x*y, x**y, x*(1/y))
# 加,减,乘,幂,除
tensor([ 3.,  4.,  6., 10.]) tensor([-1.,  0.,  2.,  6.]) tensor([ 2.,  4.,  8., 16.]) tensor([ 1.,  4., 16., 64.]) tensor([0.5000, 1.0000, 2.0000, 4.0000])
继承于np.array, 可以对张量内部进行函数运算。
print(torch.exp(x))

tensor([2.7183e+00, 7.3891e+00, 5.4598e+01, 2.9810e+03])
点成,矩阵乘法,暂时按下不表
把多个张量连结(concatenate)
X = torch.arange(12, dtype=torch.float32).reshape((3,4))
Y = torch.tensor([[2.0, 1, 4, 3], [1, 2, 3, 4], [4, 3, 2, 1]])
print(torch.cat((X, Y), dim=0), torch.cat((X, Y), dim=1))


tensor([[ 0.,  1.,  2.,  3.],
        [ 4.,  5.,  6.,  7.],
        [ 8.,  9., 10., 11.],
        [ 2.,  1.,  4.,  3.],
        [ 1.,  2.,  3.,  4.],
        [ 4.,  3.,  2.,  1.]]) tensor([[ 0.,  1.,  2.,  3.,  2.,  1.,  4.,  3.],
        [ 4.,  5.,  6.,  7.,  1.,  2.,  3.,  4.],
        [ 8.,  9., 10., 11.,  4.,  3.,  2.,  1.]])
print(X == Y)

tensor([[False,  True, False,  True],
        [False, False, False, False],
        [False, False, False, False]])
source: Li Mu
Youtube -VSCode, python venv,
Microsoft Powershell
GPT
3 矩阵计算
计算法则:
链式 d(f(g(x))/dx = d(f)/dg * d(g(x))/dx
$ \frac{d(f(g(x))}{dx} = \frac{df}{dg} *\frac{d(g(x))}{dx}$
dot product:
duv/dx = vdu/dx+udv/dx
du+v/dx= du/dx + dv/dx
$\frac{duv}{dx} = \frac{vdu}{dx}+\frac{udv}{dx}$
常见导数
| y | a | x^n | exp(x) | log(x) | sin(x) |
|---|---|---|---|---|---|
| dy/dx | nx^{n-1} | exp(x) | 1/x | cos(x) |
性质:
若 d(X^TAX)/dX=AX+A^TX, 若A是nxn矩阵。
若 ABC = (a)1x1 一个标量scalar, 则可以给他取个转置,无影响。
梯度
就是导数延申到向量
️️ ️️️️ ️️️️️ ️️️️ ️️️️ ️️️️️ ️️️️️️ ️️️️ ️️️️ ️️️️标量 向量
️️ ️️️️ ️️️️ ️️️️ ️️️️ ️️️️️️ ️️️️️️ ️️️️ ️️️️ ️️️️ x $x$
标量 y dy/dx dy/${dx}$
向量 $y$ d$y$/dx $\frac{dy}{dx}$
完成此课程后会
多上GitHub。reddit或者Hugging Face。坚决不在局域网里,**所迫

emmm,想学或者想看的,此是原网址
https://brilliant.org/courses/intro-neural-networks/introduction-65/neural-nets-2/6/